In the article, we present a complete guide & safe reminders on how to remove starter earrings, stuck butterfly back, screw-on, flat back & safety earring backs from your earlobe.
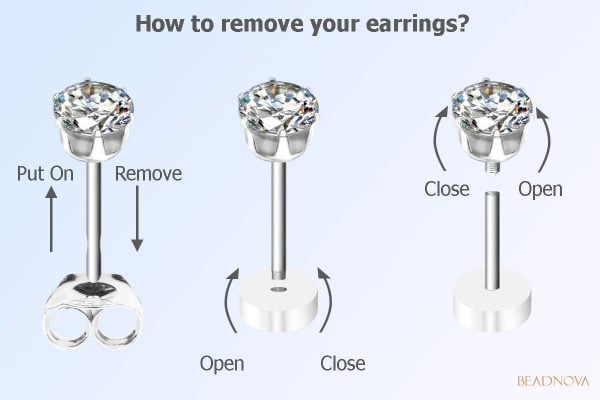
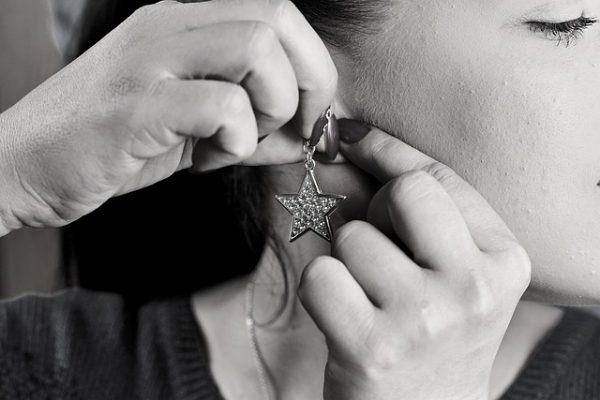
How to remove your earrings?
For those who have an ear piercing, there might be times of having an earring back stuck for some reason. It can be stressful when earring back doesn’t come off. There will be times that even screw-on earring backs become stuck due to poor threading or being affixed too tightly to the earring post. In this article, we want to share how you can remedy an “earring back stuck” situation with different types of earrings. Here are also some advices to take off the earring safely, so you don’t end up damaging your ear tissue.
Earring backs don’t come off? No problem!
The most common earring backs that get stuck to ears are the butterfly backs and the screw-in studs.
Table of Contents
Why are butterfly backs stucked?
Butterfly backs can become stuck for two main reasons:
1. The butterfly back is too tight (factory issue)
2. When you pushed the post into it, the tightness of the metal curls is increased by the addition of the metal post in between.
How to remove stuck butterfly earring backs?
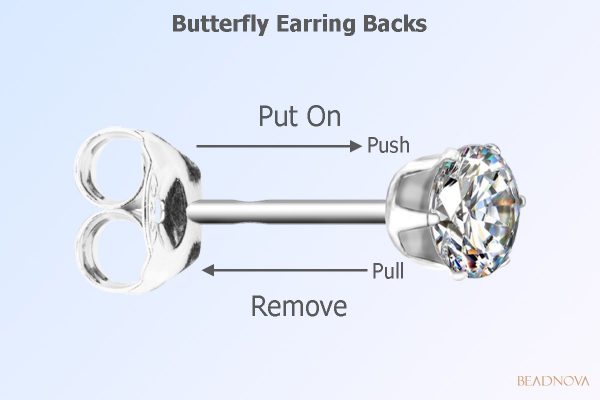
Take off the earring by pull the back, push the back to put on
If this seems to be the case what you can do is to hold the post of the earring and gently pull out the butterfly coil to remove the ‘bite’ of the metal on the post. Getting one side of the butterfly back loose is already a good sign, as you only need a fraction of a millimeter to loosen a stuck earring sometimes.
Read more: Stuck Butterfly Back Earring Sharing: How To Remove Safely?
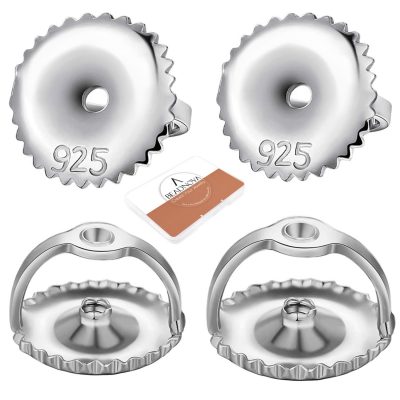
Why are screw-back earrings stucked?
![]() If it happens to be using a screw-on type of earring and the screw-type back is not budging, it’s possible that you have tightened it too much. Don’t panic: simply hold the post of the earring with your thumb and forefinger and try to rotate the screw-type back to and fro until the threading inside gives way. When you finally feel something loosen, simply keeping rotate the back to left until it releases the thread completely. Gently pull out the post and wipe your ears down, especially if the earring has been there for a few days.
If it happens to be using a screw-on type of earring and the screw-type back is not budging, it’s possible that you have tightened it too much. Don’t panic: simply hold the post of the earring with your thumb and forefinger and try to rotate the screw-type back to and fro until the threading inside gives way. When you finally feel something loosen, simply keeping rotate the back to left until it releases the thread completely. Gently pull out the post and wipe your ears down, especially if the earring has been there for a few days.
This is basic hygiene to prevent infections and to keep the area smelling fresh. Be sure to swab the front and back of the ear and check for any effuse or fluids that may be a warning sign for infection.
This may take some time because we don’t want to damage the ear tissue, so just be patient.
Old screw-type earrings that are not made of rustproof material tend to clog with rust, so be careful with selecting earrings. Sometimes, these situations come about because the tip of the earring post and the screw-type back have become both so rusty that they shouldn’t be used anymore in the first place.
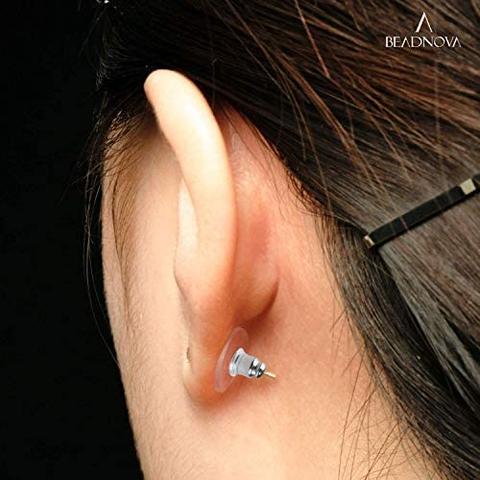
How to remove flat back earrings and ball back earrings?
There are two types of screw-on earrings, externally threaded earrings and internally threaded earrings. The difference is the position of threads, the former’s thread is at the back of the earring and latter’s thread is internal to the post at the front of the earring. Those can be flat back and ball back earrings. Make sure to wash your hand before you start to remove the earrings, oil and sweat of your hand can be removed, it can help you to take the earring out easily.
Type 1: Screw-back earrings / externally threaded earrings

Hold and rotate the back of the screw-type earring to open and close
To open: simply hold the front of the earring with your fingers, then hold the back with your other hand, then keep rotating the back to the left until the back is completely released.
To close: Keeping rotate the back to the right until the back is tightened.
Type 2: Internally threaded earrings
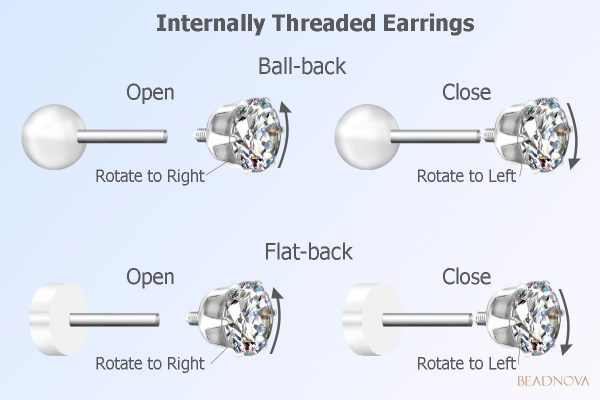
A bit different with the screw-back earring is to hold and rotate the front of the earring to open and close
To open: simply hold the back of the earring with your fingers, then hold the front with your other hand, then keep rotating the front to the left until it is completely released.
To close: Keeping rotate the back to the right until the back is tightened.
When you want to put on an internally threaded earring, simply put the back of the earring to your earlobe from back to front, then hold and rotate the front of the earring until it is completely tightened.
Reminders when removing earrings
When removing earrings, keep in mind the following:
Earring Back Got Stuck. How to remove it safely?
For first-time piercings
For those with first-time piercings, it is common for some fluids to emanate from the piercing itself. The extra build-up of fluid, which may contain blood in some instances, can cause rust in the earring back. Be extra careful when there is any kind of itching or pain present when you wear your earrings, as this can be a sign that your body is reacting negatively to the presence of the metal. Be sure to hold the earring post as firmly as you can and try to slide out the earring back at just the right angle so that it won’t ‘bite’ the metal on its way out, which would only prolong the problem.
Fluids from the screw-type earrings
The same principle applies when you have a screw-type back – fluids from the piercing may have inadvertently glued the threading to the back, causing it to become stuck. Luckily, bodily fluids are not glue-like, so the clasp should come undone with some gentle coaxing. Take note – gentle. Do not force the clasp out as this may cause pain and even tissue damage.
Make sure the back is perfectly flat when putting on screw-type earrings
As a preventive measure when putting on screw-type earrings, make sure that the back is perfectly flat against the tip of the earring post when putting it on. Sometimes, people are able to ‘force’ the screw-type back onto the threaded post at a bad angle.

Earrings
Use a mirror when putting on screw-type earrings
The threading will bite the inner threading of the back but will cause it to become eventually stuck because the metal lines do not run perfectly parallel to each other, which should be the case. If you can’t really feel if the screw-type back is perfectly aligned, use a mirror.
Sanitize your hands before removing earrings
Be sure to sanitize your hands before attempting to remove a stuck back off an ear. This applies most especially to kids who have just gotten their first piercing. You wouldn’t want to introduce the infection to the ear just because you wanted to remove the back in the first place. Ear infections from dirty piercings are a thing, they are real, and they can happen to anyone, regardless of age, or how many piercings you may already have.
Don’t choose screw-on earrings for kids
We do not recommend you give kids screw-on earring backs as it is harder to put on and remove. Unless the child is already very dexterous with her hands, butterfly back earrings are better than screw-on earring backs. There should also be additional instruction on how to properly wear the earrings, so they won’t have to face the difficulty of being pinched by the clasps.
More articles you may interest:
Removing a stuck ring is extremely painful, learn 5 easy ways to take a ring off that is stuck.
Do you have a small bangle that hard to wear? know how to put on a stuck bangle onto the wrist easily.


Leave A Comment