
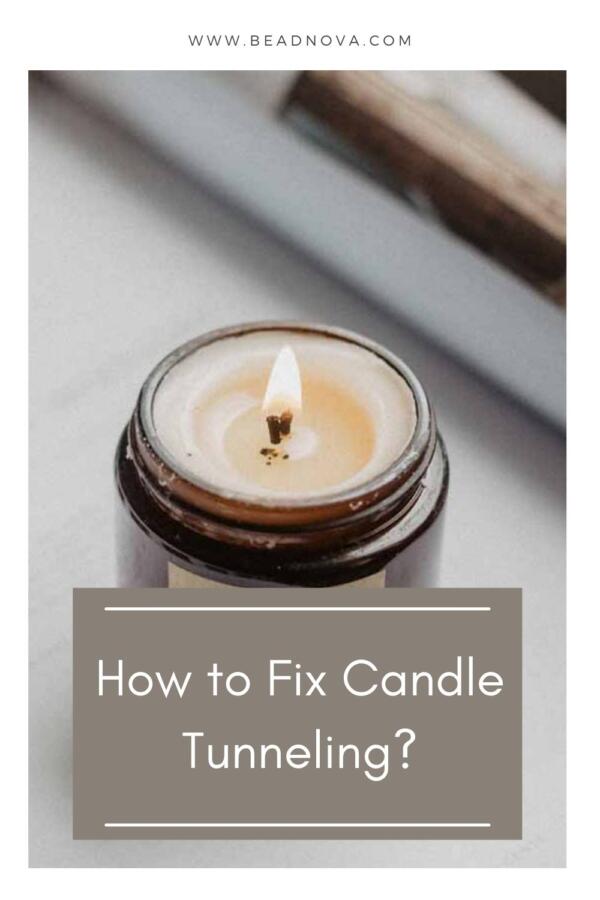
Candle tunneling is a common problem that occurs when the wick of a lit candle is too large, or the wax pool of a burning candle is too small. This can cause the flame to burn down into the middle of a candle, resulting in an uneven burn and leaving soot and ash on the walls of your jar. If you’ve been experiencing this issue with your candles, don’t worry! We’re here to help you get your candles burning evenly and prevent any further damage. Read on for our guide on how to fix candle tunneling.
Table of Contents
How to Fix Candle Tunneling?

The bigger your candles at home, the higher the possibility of encountering tunneling repeatedly. While many people don’t like to see tunneling occur, it’s completely normal, and a lot of times, it’s unavoidable because people don’t have time to burn off melted surface wax completely. Edge-to-edge burning requires many hours, and people usually use candles during power outages or for a few hours when they want to relax outside in the evening.
A lot of factors can cause higher incidences of tunneling. Sometimes it’s the type of wax used in the candle. Other times, oddly-shaped candles make it harder for wicks to burn off the wax evenly. There are drawbacks to novelty shapes, and if you are using cheap candles at home (or cheap candle wax), these might be worth investigating, too.
Generally speaking, tunneling occurs more frequently in wider jars because there’s not enough of the wick to go around. That’s why we explained above why it’s a good idea to use multi-wick candles. Multi-wick candles not only improve the evenness of the burn but also happen to prevent any tunneling from happening.
Read more: How To Make 3-wick Candle?
If you are stressed beyond belief because it’s happening to your expensive candle, don’t. It doesn’t matter if you are using a $1 candle or a $900 one – it’s going to happen sometimes.
Here are some ways to fix the tunneling phenomenon:
1. Trim Your Wick Before Lighting
The first step in preventing candle tunneling is making sure that you always trim your wick before lighting it. A wick that has not been trimmed can easily become too long and draw up too much wax during its burn, leading to tunneling. To avoid this, make sure you use scissors or a wick trimmer to cut your wick down to about ¼ inch prior to lighting it each time. This will ensure that the flame doesn’t draw up too much wax at once and cause tunneling.
Read more: Why You Should Trim Candle Wick?
2. Add an aluminum dome
This is a clever trick that takes seconds to complete but can reduce the time needed to burn off melted surface wax. Essentially, you are going to make a donut-shaped dome that fits tightly around the glass jar. There will be a circular space in the center to allow light to stream out. The aluminum will help reflect the heat, so the wax burns faster. Essentially, we will be increasing the temperature around the wax so it doesn’t tunnel or it doesn’t burrow as quickly.
3. Use the right wick type and size
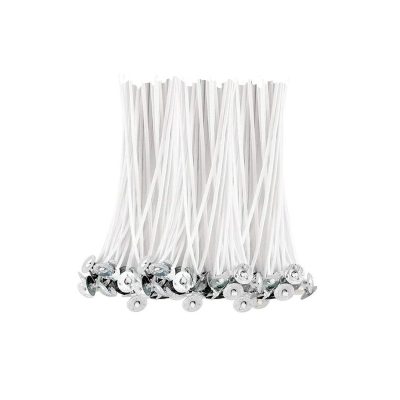
Find our candle wicks for your candle-making.
If you find yourself having trouble with candle tunneling even after following the ways above, it could mean that you need to switch out the size of the wick used in your particular jar size. Different sizes of jars require different sizes of wicks in order for them to perform correctly – so if one size isn’t working for yours, try switching it out and see if that helps solve any issues!
Just remember – when choosing a new wick size for your jar size always choose one that’s slightly larger than what was originally recommended (since larger-sized ones tend to produce more heat).
4. Ensure You Have Enough Wax Pool
Another step in preventing candle tunneling is ensuring that you have enough wax pool around the edges of your jar or container. If there isn’t enough wax pool (this means liquid melted wax all around the edges of your jar), then the flame won’t be able to draw up enough fuel from the surrounding wax and will start burning down into itself instead.
To avoid this, make sure you always allow your candle’s entire top layer of wax to completely melt before extinguishing it – this will ensure there’s enough liquid melted wax around all sides of your jar for the next time you light it up!
Candle tunneling can be an annoying issue when trying to enjoy a nice candle; however, with these easy steps outlined above, we hope we’ve made it easier for you to fix this problem quickly and easily! Don’t forget – always make sure you trim your wick before lighting, maintain an adequate amount of melted wax around all sides of your jar/container while burning, and choose a slightly larger-than-recommended size wick, or add an aluminum dome for best results! With these simple tips in mind, we’re confident that all future candles will burn without any tunneling issues whatsoever! Good luck!
More articles about candle making you may interest:
How To DIY Candle At Home For Beginners?
How to Get Candle Wax Out of Clothes?


Leave A Comment